

Key takeaways
- Home Beer Brewing design
- Beergineer
- Lightweight, Classic fit, Double-needle sleeve and bottom hem
For a first batch, choose a 1-gallon, no-boil ale or cider kit if you want the simplest setup; choose a 5-gallon extract ale kit if you have room for a fermenter and want more beer per brew day. These are the best homebrew recipes for first time brewers by situation: a forgiving pale ale for a quick beer, a malt-forward amber for a little more flavor, a lager-style kit only if you can control fermentation temperature, and apple cider for the shortest ingredient list.
Our top picks
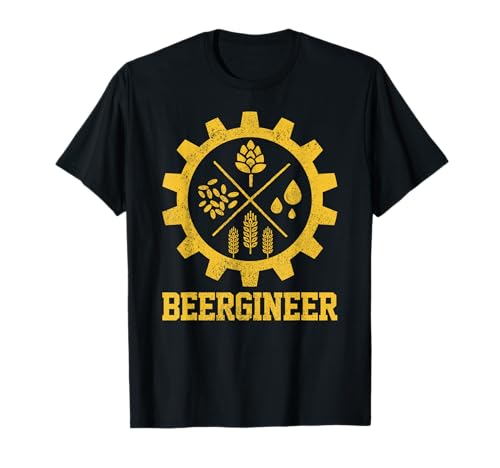 Beergineer Homebrew Home Brewing Craft Beer Brewer
- Home Beer Brewing design
- Beergineer
- Lightweight, Classic fit, Double-needle sleeve and bottom hem

As an Amazon Associate we earn from qualifying purchases at no extra cost to you.
Best beginner homebrew kits at a glance
Brew time below means the typical time from starting the batch to packaging, not the time spent actively working. Actual fermentation and conditioning vary with the recipe, yeast, and temperature. ABV is an approximate range; follow the kit’s recipe and use a hydrometer if you want to check it.
| Kit or recipe style | Typical batch | Approx. ABV | Typical time to package | Equipment beyond the kit | Best for |
|---|---|---|---|---|---|
| Hopped pale ale extract kit | 5 gal / 19 L | 4.0–5.5% | 3–5 weeks | Food-grade fermenter, airlock, sanitizer, siphon, bottles and capper | First-time beer brewers with a cool, stable place to ferment |
| Amber ale extract kit | 5 gal / 19 L | 4.5–6.0% | 4–6 weeks | Same as pale ale; a large boil kettle may be needed if the recipe calls for boiling | Brewers who prefer a rounder, maltier beer |
| One-gallon blonde or pale ale kit | 1 gal / 3.8 L | 4.0–5.5% | 3–5 weeks | Small fermenter, airlock, sanitizer, siphon or bottling wand, and a few bottles | Limited space, low commitment, or testing a style |
| Lager-style kit with lager yeast | 5 gal / 19 L | 4.0–5.5% | 6–10 weeks | Beer equipment plus reliable temperature control for cool fermentation and conditioning | Brewers with a temperature-controlled fridge or chamber |
| Apple cider concentrate kit | 1–5 gal / 3.8–19 L | 4.5–7.0% | 3–6 weeks | Fermenter, airlock, sanitizer, siphon, and bottles; follow the kit’s yeast and priming directions | People who want a simple, fruit-forward first ferment |
Which kit fits your first batch?
- Choose a 1-gallon ale kit if you have little storage space or want to learn sanitation and fermentation without committing to a case of beer. Small batches are easier to move, but they still require careful measuring and cleaning.
- Choose a 5-gallon pale ale kit if you want a familiar, forgiving beer and have space for a full fermenter. A no-boil or pre-hopped extract kit cuts down on kettle work and ingredient decisions.
- Choose amber ale if you prefer a richer, less sharply bitter flavor. It uses much the same process as pale ale, so the extra challenge is minimal.
- Choose cider if you’d rather ferment apple juice or concentrate than make a wort. Check whether the kit includes fermentable sugar, yeast, and priming sugar; these are not interchangeable, and adding extra sugar can raise the eventual alcohol level.
- Wait on lager unless you can keep fermentation within the yeast’s recommended range. A cool basement may work for some strains, but ordinary room temperatures can produce unwanted flavors. “Lager-style” recipes made with ale yeast are a different, easier option; check the kit’s yeast instructions.
What the equipment list really means
A kit labeled “starter” may contain ingredients and a fermenter but not everything needed to package the drink. Before buying, check for a fermenter with a lid, airlock, sanitizer, siphon or bottling wand, bottles, caps, and a capper. A hydrometer and test jar are useful for checking whether fermentation is finished. A thermometer helps you avoid pitching yeast into wort or juice that is too hot.
For a typical 5-gallon batch, a fermenter must hold more than the finished volume to allow foam and headspace; a vessel around 6.5 gallons (about 25 L) is a common size. For a 1-gallon batch, use the vessel size specified by the kit rather than filling a bottle to the brim. Leave space for fermentation activity, and keep the fermenter out of direct sunlight.
Budget by what you’ll reuse
Ingredient kits commonly fall around $25–$60, while equipment bundles often cost roughly $70–$150 or more, depending on batch size and included tools. These are broad market ranges, not quotes for a particular seller. The fermenter, siphon, sanitizer, and capper can be reused; yeast, ingredients, caps, and cleaning supplies are recurring costs. A 5-gallon batch yields roughly 48–50 twelve-ounce bottles before losses, so a $35 ingredient kit works out to about $0.70 per bottle before equipment, bottles, energy, and replacement supplies. A one-gallon batch makes roughly eight bottles, so it is a smaller experiment, not necessarily a cheaper beer.
A low-stress first brew in five steps
- Read the kit recipe and verify the equipment. Confirm batch size, yeast temperature range, packaging method, and whether the kit requires a boil. Set out everything first so you are not searching for a siphon mid-brew.
- Clean, then sanitize. Cleaning removes visible residue; sanitizing reduces microbes on surfaces that touch cooled wort or cider. Follow the sanitizer’s contact-time directions and don’t rinse unless its label says to.
- Prepare the liquid as directed and cool it before adding yeast. Use the recipe’s water volume and temperature instructions. Adding yeast to liquid that is too hot can damage it; adding extra water or sugar changes the recipe’s strength and balance.
- Ferment at a steady, yeast-appropriate temperature. Keep the airlock filled as directed and avoid opening the fermenter just to check progress. Bubbling is not a dependable finish line: activity can slow while fermentation is still underway.
- Package only when fermentation is complete. If you have a hydrometer, readings that remain stable over a couple of days are a useful check, alongside the kit’s instructions. Measure priming sugar carefully and use pressure-safe bottles. Too much sugar or bottling before fermentation finishes can create excessive pressure.
Common first-batch mistakes to avoid
- Skipping sanitation: anything that touches cooled wort or fermenting cider needs the kit-recommended cleaning and sanitizing process.
- Guessing at temperature: yeast performs best within its stated range. A warm room can make fermentation run hot even when the room feels comfortable.
- Adding sugar “for strength”: extra fermentable sugar changes ABV and flavor and can create packaging pressure if measurements are careless.
- Rushing bottling: a quiet airlock does not prove fermentation has stopped. Give the batch the recommended time and check gravity if possible.
- Expecting a kit to include everything: confirm packaging gear and bottles before brew day. This is especially important for cider kits, which may specify a different sweetening or carbonation approach.
Bottom line: A no-boil pale ale or amber ale kit is the best all-around first beer when you have stable fermentation space. Pick a one-gallon kit to minimize storage and batch size, cider for a straightforward fruit-based ferment, and lager only when you can meet its temperature requirements. The easiest kit is the one whose batch size, equipment list, and yeast instructions fit your actual kitchen and storage space.




Write Your Review
No reviews yet. Be the first to share your experience!