

Key takeaways
- 4 pounds sweet apples, such as Gala, Fuji, Honeycrisp, Golden Delicious, or Pink Lady
- 2 pounds tart apples, such as Granny Smith, Braeburn, or McIntosh
- 10 cups cold water
- 3 cinnamon sticks
- 6 whole cloves
- 4 whole allspice berries
- 1 small orange, quartered
- Optional sweetener, added only after straining
This apple cider recipe makes about 2 quarts (1.9 liters) of fragrant, unsweetened-to-taste cider on the stovetop from 6 pounds of apples, water, cinnamon, cloves, and citrus. Simmer the fruit gently for 2 hours, mash it thoroughly, strain it through a fine-mesh sieve or cheesecloth, and refrigerate the finished cider for up to 5 days.
The best choice for reliable flavor is a mixture of sweet and tart apples rather than one variety alone: use 4 pounds of sweet apples and 2 pounds of tart apples. You do not need to peel or core them, but remove stems, damaged areas, and any visibly bruised or moldy flesh before cooking.
Our top picks

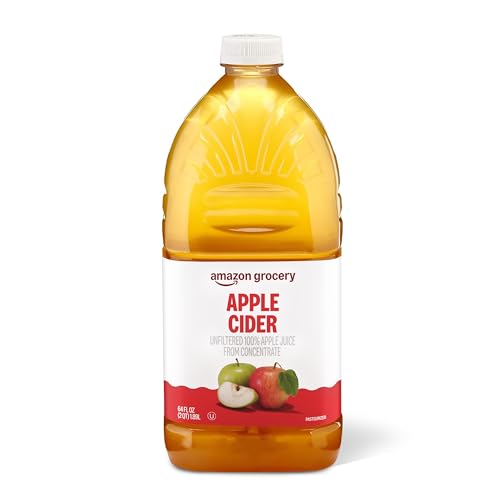
As an Amazon Associate we earn from qualifying purchases at no extra cost to you. Ratings are shown as listed on Amazon.
Stovetop Apple Cider at a Glance
| Ingredient or stage | Precise amount | Why it matters |
|---|---|---|
| Apples | 6 pounds, roughly 12 medium apples | Provides body, sweetness, acidity, and aroma |
| Water | 10 cups, or 2.4 liters | Extracts flavor without making the cider thin |
| Cinnamon | 3 whole sticks, about 3 inches each | Adds warm spice without the sediment of ground cinnamon |
| Cloves | 6 whole cloves | Contributes a concentrated, aromatic spice note |
| Allspice | 4 whole berries | Adds peppery, clove-like depth |
| Orange | 1 small orange, quartered | Brightens the cider; remove excess white pith if very bitter |
| Sweetener | Optional: 2 to 4 tablespoons brown sugar or maple syrup | Adjusts sweetness after straining, when the flavor is clear |
| Finished yield | Approximately 8 cups, or 2 quarts | Yield varies with evaporation and how firmly the pulp is pressed |
What Makes This an Apple Cider Recipe Rather Than Apple Juice?
Apple cider is typically a cloudy, unfiltered drink made by extracting juice from crushed or cooked apples, while apple juice is commonly filtered and clarified. This stovetop version is a practical home method: the apples are simmered with water and spices, mashed to release their juices, and strained without trying to make the liquid perfectly clear.
The result will be darker, more aromatic, and more textured than bottled apple juice. Because it is not commercially pasteurized or preserved, treat it as a perishable homemade beverage and keep it refrigerated.
Ingredients and Equipment
Use a 6- to 8-quart heavy-bottomed stockpot. A smaller pot may overflow once the apples soften, while a very wide pot can evaporate the water too quickly. You will also need a chef’s knife, cutting board, potato masher or sturdy wooden spoon, fine-mesh sieve, and a large heatproof bowl or second pot.
- 4 pounds sweet apples, such as Gala, Fuji, Honeycrisp, Golden Delicious, or Pink Lady
- 2 pounds tart apples, such as Granny Smith, Braeburn, or McIntosh
- 10 cups cold water
- 3 cinnamon sticks
- 6 whole cloves
- 4 whole allspice berries
- 1 small orange, quartered
- Optional sweetener, added only after straining
For the best balance, avoid using only very sweet apples. A cider made entirely from mild sweet varieties can taste flat after dilution, whereas all tart apples may require substantial sweetener. If weighing apples is inconvenient, use approximately 12 medium apples and aim for a full pot that leaves at least 2 inches of space below the rim.
How to Make Homemade Apple Cider on the Stovetop
-
Wash and cut the apples. Rinse the apples under cool running water, then quarter them. Remove stems, leaves, damaged spots, and any mold. You may leave the skins, cores, and seeds in place; the solids will be strained later. Cutting each quarter into two pieces exposes more surface area and helps the apples soften evenly.
-
Load the pot. Put the apple pieces into a 6- to 8-quart stockpot. Add the cinnamon sticks, cloves, allspice, and quartered orange. Pour in 10 cups of water. The water should nearly cover the apples; a few pieces floating above the surface are acceptable because they will collapse during cooking.
-
Bring the mixture to a controlled boil. Set the pot over medium-high heat and heat until the liquid reaches a boil, which usually takes 15 to 25 minutes depending on the pot and burner. Do not leave it at a vigorous rolling boil: aggressive boiling can evaporate too much liquid, break the fruit apart unevenly, and produce a harsher, cloudier drink.
-
Simmer for 2 hours. Reduce the heat to low, cover the pot partially, and simmer for 2 hours. Keep the liquid visibly bubbling but not violently boiling. Stir every 30 to 40 minutes, pressing the apples below the surface. The apples are ready when they are very soft and easily collapse against the side of the pot.
-
Mash the cooked fruit. Turn off the heat and use a potato masher or sturdy wooden spoon to crush the apples for 2 to 3 minutes. Mashing releases trapped juice, color, and soluble fruit solids. Do not purée the mixture with a blender, because finely pulverized apple pulp makes the cider difficult to strain and can create a gritty texture.
-
Strain slowly. Place a fine-mesh sieve over a large heatproof bowl or clean pot. Ladle the hot mixture into the sieve in batches. Let the liquid drain naturally for 5 to 10 minutes, then press the pulp gently with the back of a ladle. For a smoother cider, line the sieve with one layer of cheesecloth. Excessive squeezing forces fine pulp through the mesh and makes the drink thicker and more sediment-prone.
-
Taste and adjust. While the cider is still warm, taste a small spoonful after allowing it to cool enough to avoid burns. Add 2 tablespoons of brown sugar or maple syrup at a time until it reaches your preferred sweetness. If the flavor tastes heavy, add 1 to 2 teaspoons of lemon juice; add it gradually because the tart apples already supply acidity.
-
Serve or cool promptly. Serve the cider hot in heatproof mugs, or cool it for storage. For faster cooling, divide it among shallow containers or set the pot in a sink of cold water, stirring occasionally. Refrigerate it within 2 hours of cooking, or within 1 hour if the surrounding temperature is above 90°F (32°C).
Worked Yield and Cost Estimate
A typical batch begins with 10 cups of water. After two hours of simmering and straining, evaporation and fruit absorption usually reduce that to approximately 8 cups. If your pot yields only 6 cups, the heat was probably too high or the lid was left off too long; if it yields 10 cups, the cider may taste lighter but can be reduced gently for 10 to 20 minutes after straining.
For a simple cost calculation, suppose 6 pounds of apples cost $2.00 per pound, the spices and orange cost $3.00, and optional sweetener costs $0.75. The batch costs about $15.75. Divided across eight 1-cup servings, that is approximately $1.97 per serving, before accounting for electricity or gas. Buying apples in a larger bag or using seasonal varieties can lower the cost without changing the method.
How to Choose Apples for the Flavor You Want
| Desired result | Apple ratio by weight | Example combination | Likely adjustment |
|---|---|---|---|
| Balanced everyday cider | Two-thirds sweet, one-third tart | Gala and Granny Smith | Usually needs little or no added sugar |
| Bright and tangy | Half sweet, half tart | Fuji and Braeburn | May benefit from 1 to 2 tablespoons maple syrup |
| Rich and mellow | Three-quarters sweet, one-quarter tart | Golden Delicious and McIntosh | Add lemon juice only if the flavor seems dull |
| Deep, soft fruit flavor | Include up to one-third softer cooking apples | Honeycrisp, McIntosh, and Granny Smith | Strain carefully because softer apples produce more pulp |
Apple variety matters more than appearance. Small blemishes can be trimmed away, but moldy or fermented-smelling fruit should not be used. Do not rely on cinnamon or sugar to disguise poor-quality apples; unpleasant flavors usually remain after cooking.
Storage, Reheating, and Freezing
Store strained cider in clean, covered glass jars or food-safe containers with at least ½ inch of headspace. Refrigerated cider is best used within 5 days. This is a quality and food-safety guideline for a homemade, noncommercial beverage; commercial shelf-stable cider follows a different pasteurization and packaging process.
Reheat only the amount you plan to drink. Warm it in a saucepan over low to medium-low heat until steaming, but avoid repeatedly boiling the entire batch because repeated heating dulls the apple aroma and increases evaporation. If a layer of sediment settles on the bottom, stir it back in for a fuller drink or pour carefully for a clearer cup.
To freeze the cider, cool it completely and transfer it to freezer-safe containers, leaving about 1 inch of expansion space. Freeze for up to 3 months for the best flavor. Thaw in the refrigerator, stir well, and reheat gently. Never freeze cider in a completely full glass jar, since expanding liquid can crack the container.
Common Mistakes and Ownership Realities
- Using ground spices: Ground cinnamon and clove disperse into the liquid, settle heavily, and can make the cider gritty. Whole spices are easier to remove and produce a cleaner result.
- Starting with too little water: The apples absorb liquid as they cook. Begin with 10 cups rather than adding water late, which can weaken the flavor.
- Boiling too hard: High heat is the most common cause of low yield and scorched fruit. Maintain a gentle simmer and check the pot periodically.
- Pressing the pulp aggressively: Hard pressure increases sediment and can push fibrous material through the sieve. Let gravity do most of the straining.
- Adding sugar at the beginning: Early sweetness is difficult to judge because the cider reduces and hot liquid tastes less balanced. Sweeten after straining.
- Leaving the cider out: Homemade cider has no commercial preservative system. Cool it promptly and discard it if it develops an off smell, unusual fizz, mold, or a distinctly fermented taste.
The part that wears out first in this method is usually the straining setup rather than the cookware. Cheesecloth is a consumable and may retain strong spice or fruit odors; replace it when it becomes stained, frayed, or difficult to clean. A stainless-steel fine-mesh sieve can last for years if rinsed immediately, brushed gently, and dried fully. Avoid forcing apple pulp into the mesh, as trapped fibers are harder to remove than the soft fruit itself.
Easy Variations Without Changing the Core Method
For a ginger-spiced version, add 2 ounces of fresh ginger, sliced into coins, with the other spices. For a more citrus-forward cider, add thin strips of orange peel but avoid a large amount of white pith. For a less sweet batch, omit sugar entirely and let the apple blend determine the final flavor.
To make a sparkling serving, chill the finished cider and combine ¾ cup cider with ¼ cup chilled sparkling water immediately before drinking. Do not carbonate the cider in a sealed bottle unless you are using equipment designed to control pressure, since fermentation or trapped carbonation can make an ordinary container burst.
Frequently Asked Questions
Can I make this apple cider recipe without peeling or coring the apples?
Yes. Wash the apples, remove stems and damaged sections, and cut them into quarters. The skins and cores add flavor and color, while the solids are removed during straining. Do not include moldy or badly bruised portions.
Why is my homemade cider cloudy?
Cloudiness is normal because this method extracts fine apple solids rather than clarifying the juice. Pressing the cooked pulp firmly, using a coarse sieve, or blending the fruit can increase cloudiness. For a smoother appearance, strain through cheesecloth and let the cider settle before carefully pouring off the clearer liquid.
How can I make the cider stronger without making it sweeter?
After straining, simmer the cider uncovered over low heat for 10 to 20 minutes to evaporate some water. Taste frequently because reduction concentrates both sweetness and acidity. Alternatively, use 8 cups of water instead of 10, but expect a smaller final yield.
Can I use apple juice instead of fresh apples?
Apple juice can be warmed with the spices and orange, but it will not produce the same body or fresh fruit character as this apple cider recipe. If using juice, choose unsweetened juice and begin with 8 cups; simmer it with the spices for 20 to 30 minutes, then strain. Add sugar only after tasting.
How long does homemade apple cider last?
Keep it covered and refrigerated, and use it within 5 days. Freeze it for up to 3 months if you need longer storage. Discard cider that smells fermented or unpleasant, becomes fizzy without intentional carbonation, or shows mold.
Can I make this recipe in a slow cooker?
Yes, although a slow cooker may require a longer cooking time. Cook the apples, water, and spices on high for 4 hours or low for 6 to 8 hours, then mash and strain as directed. Keep the slow cooker below its maximum fill line and check the liquid level if the lid does not seal tightly.







Write Your Review
No reviews yet. Be the first to share your experience!